
On this page
- Why Integrate Frontify with Drupal?
- Prerequisites
- Steps for Integrating Frontify with Drupal
- 1. Set Up Frontify API Access
- 2. Log in to the Drupal Admin Panel
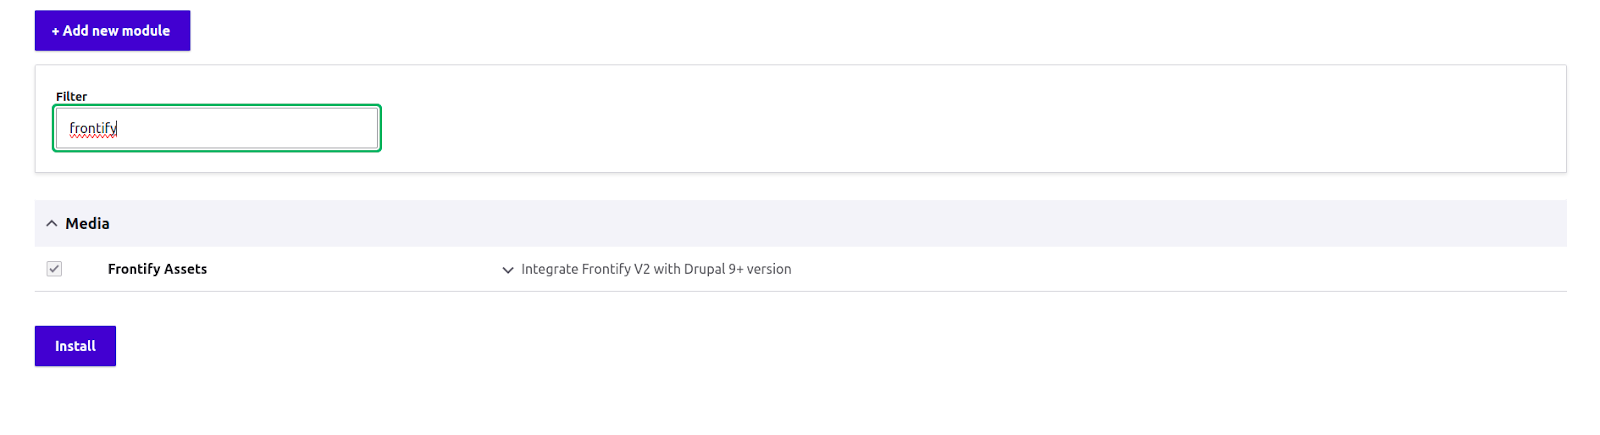
- 3. Install Frontify Assets Module
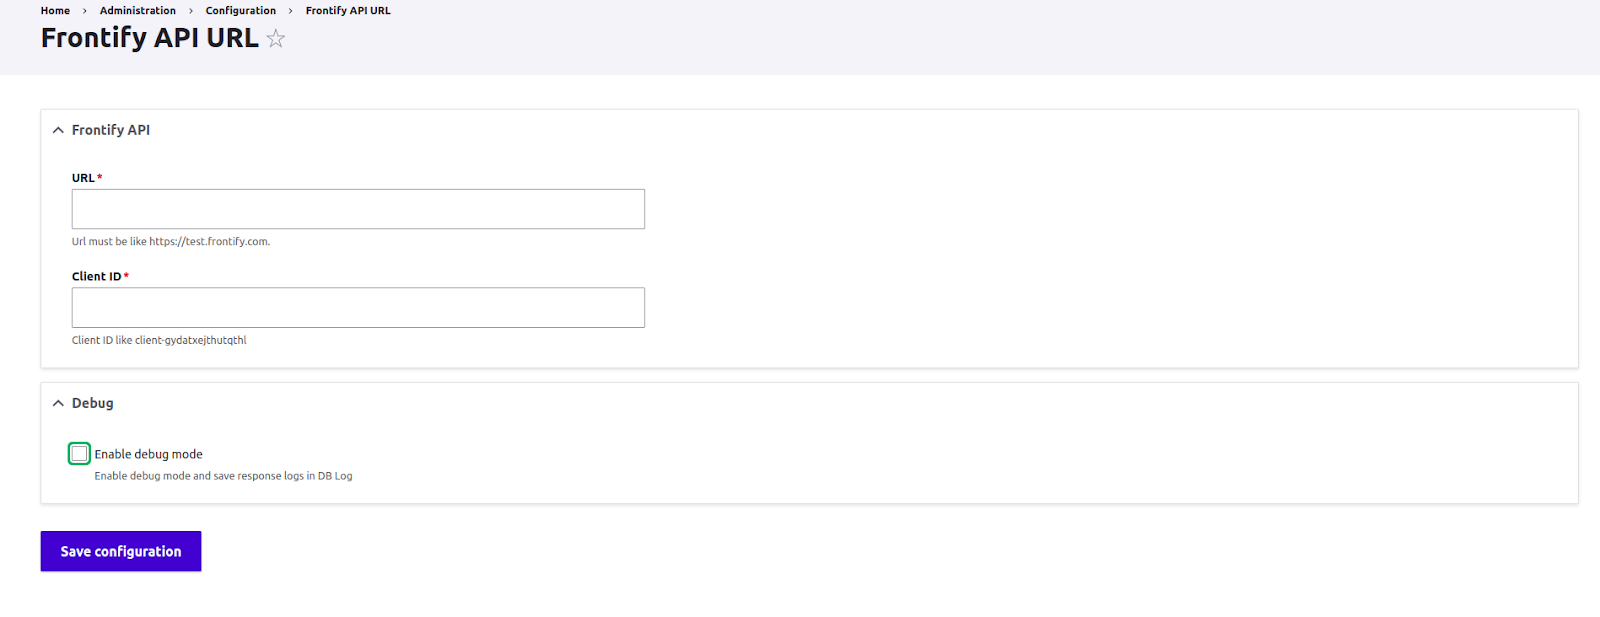
- 4. Configure the Frontify API Domain in Drupal
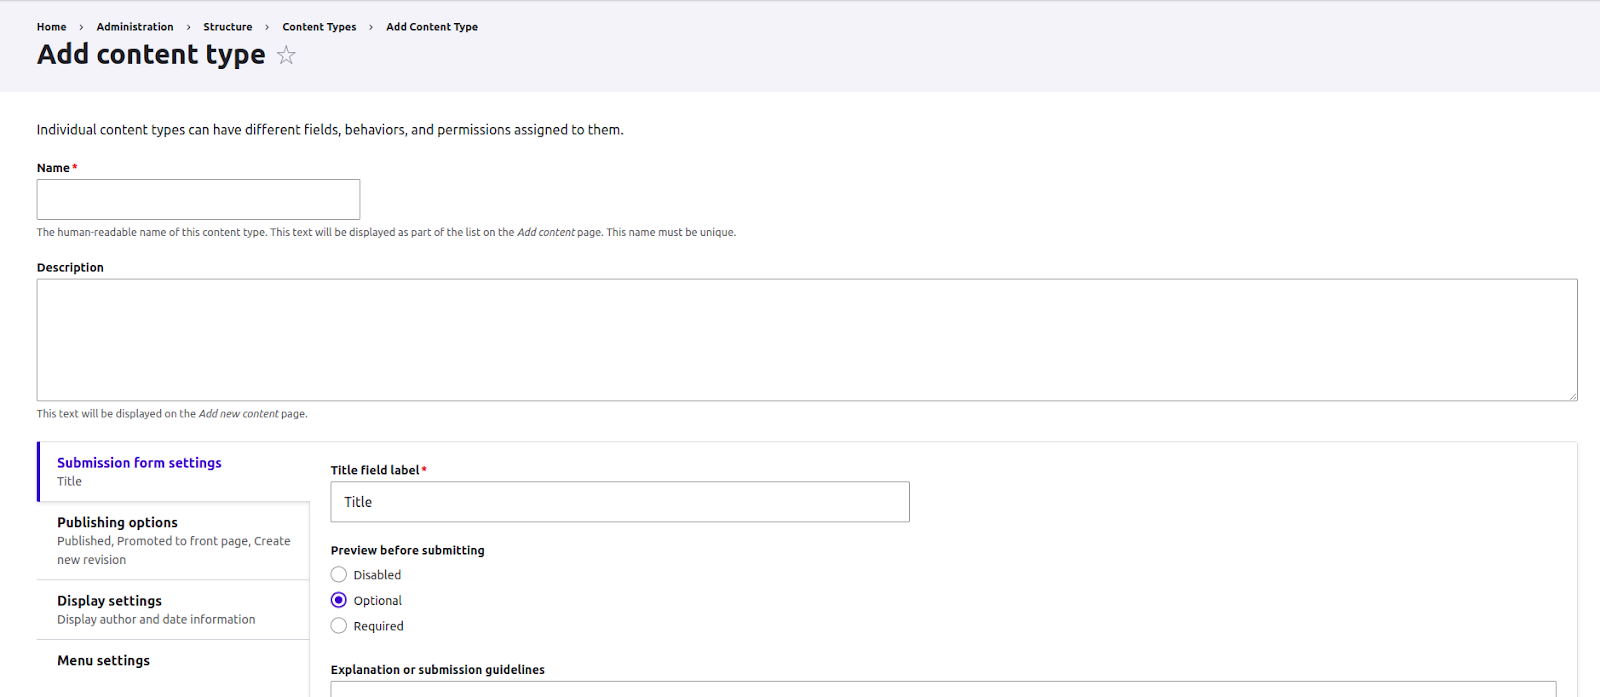
- 5. Add New Content Types Where Using Frontify Assets
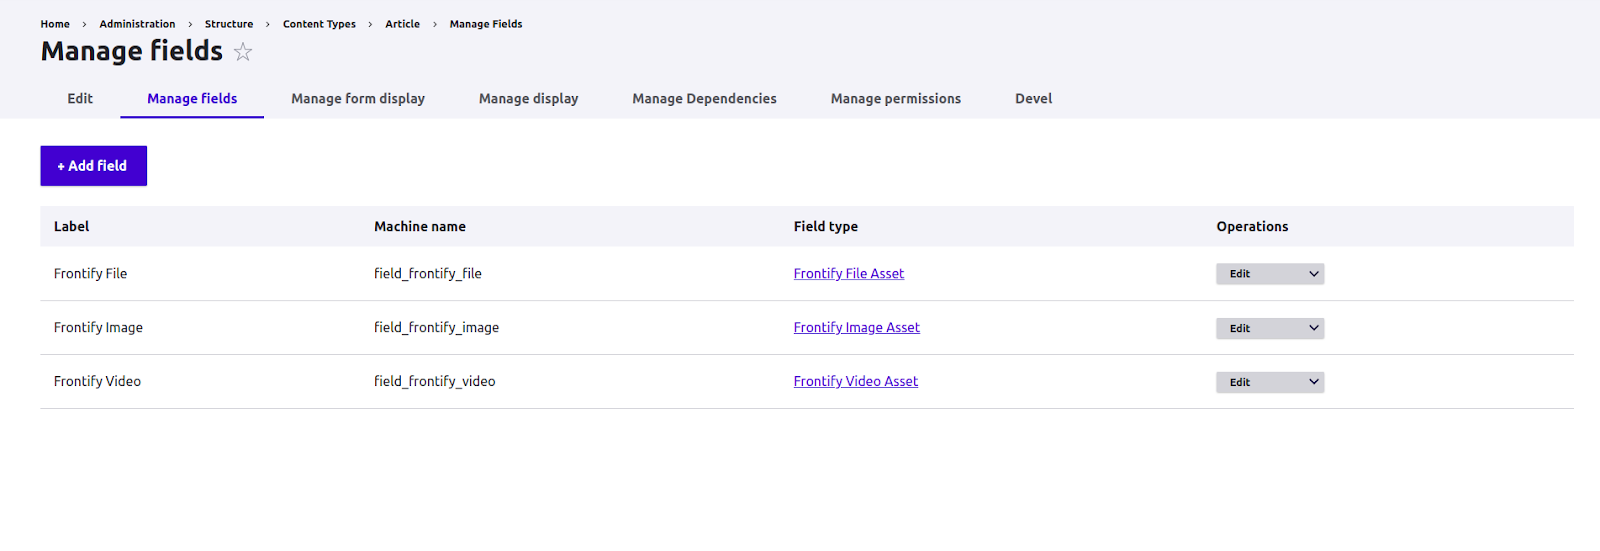
- 6. Manage Fields to Your Content Types
- 7. Use Frontify Assets in Drupal
- 8. Maintain and Update
- Best Practices
- Conclusion
Integrating Frontify with Drupal: A Comprehensive Guide
This documentation is deprecated.
As a leading platform for brand management, Frontify offers tools for creating and maintaining brand guidelines, asset management, and collaborative design processes. Integrating Frontify with Drupal, one of the most powerful content management systems, can streamline your workflow, enhance your digital presence, and maintain brand consistency across your projects. In this blog, we’ll walk you through the process of integrating Frontify with Drupal, highlighting the benefits, key steps, and best practices.
Why Integrate Frontify with Drupal?
-
Brand Consistency: Centralize brand assets and guidelines to ensure that your website adheres to brand standards.
-
Enhanced Collaboration: Streamline team communication by using Frontify as a single source of truth for brand assets.
-
Dynamic Content Management: Effortlessly pull in assets from Frontify directly into your Drupal site, saving time and improving efficiency.
Prerequisites
Before diving into the integration process, ensure you have the following:
-
A working Drupal 9.5+ instance.
-
An active Frontify account with access to your brand assets and guidelines.
-
Basic understanding of Drupal development.
-
Download the plugin from here Frontify integration on your Drupal platform
Steps for Integrating Frontify with Drupal
1. Set Up Frontify API Access
To get started, you need to access the Frontify API:
-
Log into your Frontify account and navigate to Settings > API Keys.
-
Create a new API key, ensuring you grant it the necessary permissions to access brand assets and guidelines.
-
Make a note of the API key, as you’ll need it for your Drupal integration.
2. Log in to the Drupal Admin Panel
Log in to your Drupal admin panel.

3. Install Frontify Assets Module
Go to: Extend > List
Page Url - /admin/modules
Search "Frontify Assets". Check the Frontify Assets module and click on install.
4. Configure the Frontify API Domain in Drupal
Configure the Frontify domain to make use of this integration.
Go to: Home > Administration > Configuration > Frontify
5. Add New Content Types Where Using Frontify Assets
Create content types where you want to make use of Frontify assets.
Go to: Home > Administration > Structure > Add Content Type
6. Manage Fields to Your Content Types
Configure your fields and define where you want to make use of Frontify assets.Go to: Home > Administration > Structure > Content Type > Manage Fields
7. Use Frontify Assets in Drupal
Add / Edit
Frontify Finder

8. Maintain and Update
-
Regularly update your Frontify API key and ensure permissions are set correctly.
-
Monitor for any changes in the Frontify API that may affect your integration.
Best Practices
-
Security: Always store your API keys securely, preferably using Drupal’s configuration management system.
-
Performance: Cache API responses where possible to improve loading times and reduce API calls.
-
Documentation: Document your integration process and code for future reference and for other developers who may work on the project.
Conclusion
Integrating Frontify with Drupal opens up a world of possibilities for managing your brand assets effectively. By following the steps outlined above, you can ensure that your Drupal site remains consistent with your brand guidelines, streamlining your workflow and enhancing collaboration across teams. Whether you are building a new site or enhancing an existing one, this integration is a valuable addition to your digital toolkit.
Help improve this page
You can:
- Log in, click Edit, and edit this page
- Log in, click Discuss, update the Page status value, and suggest an improvement
- Log in and create a Documentation issue with your suggestion
