
Configuring Facebook
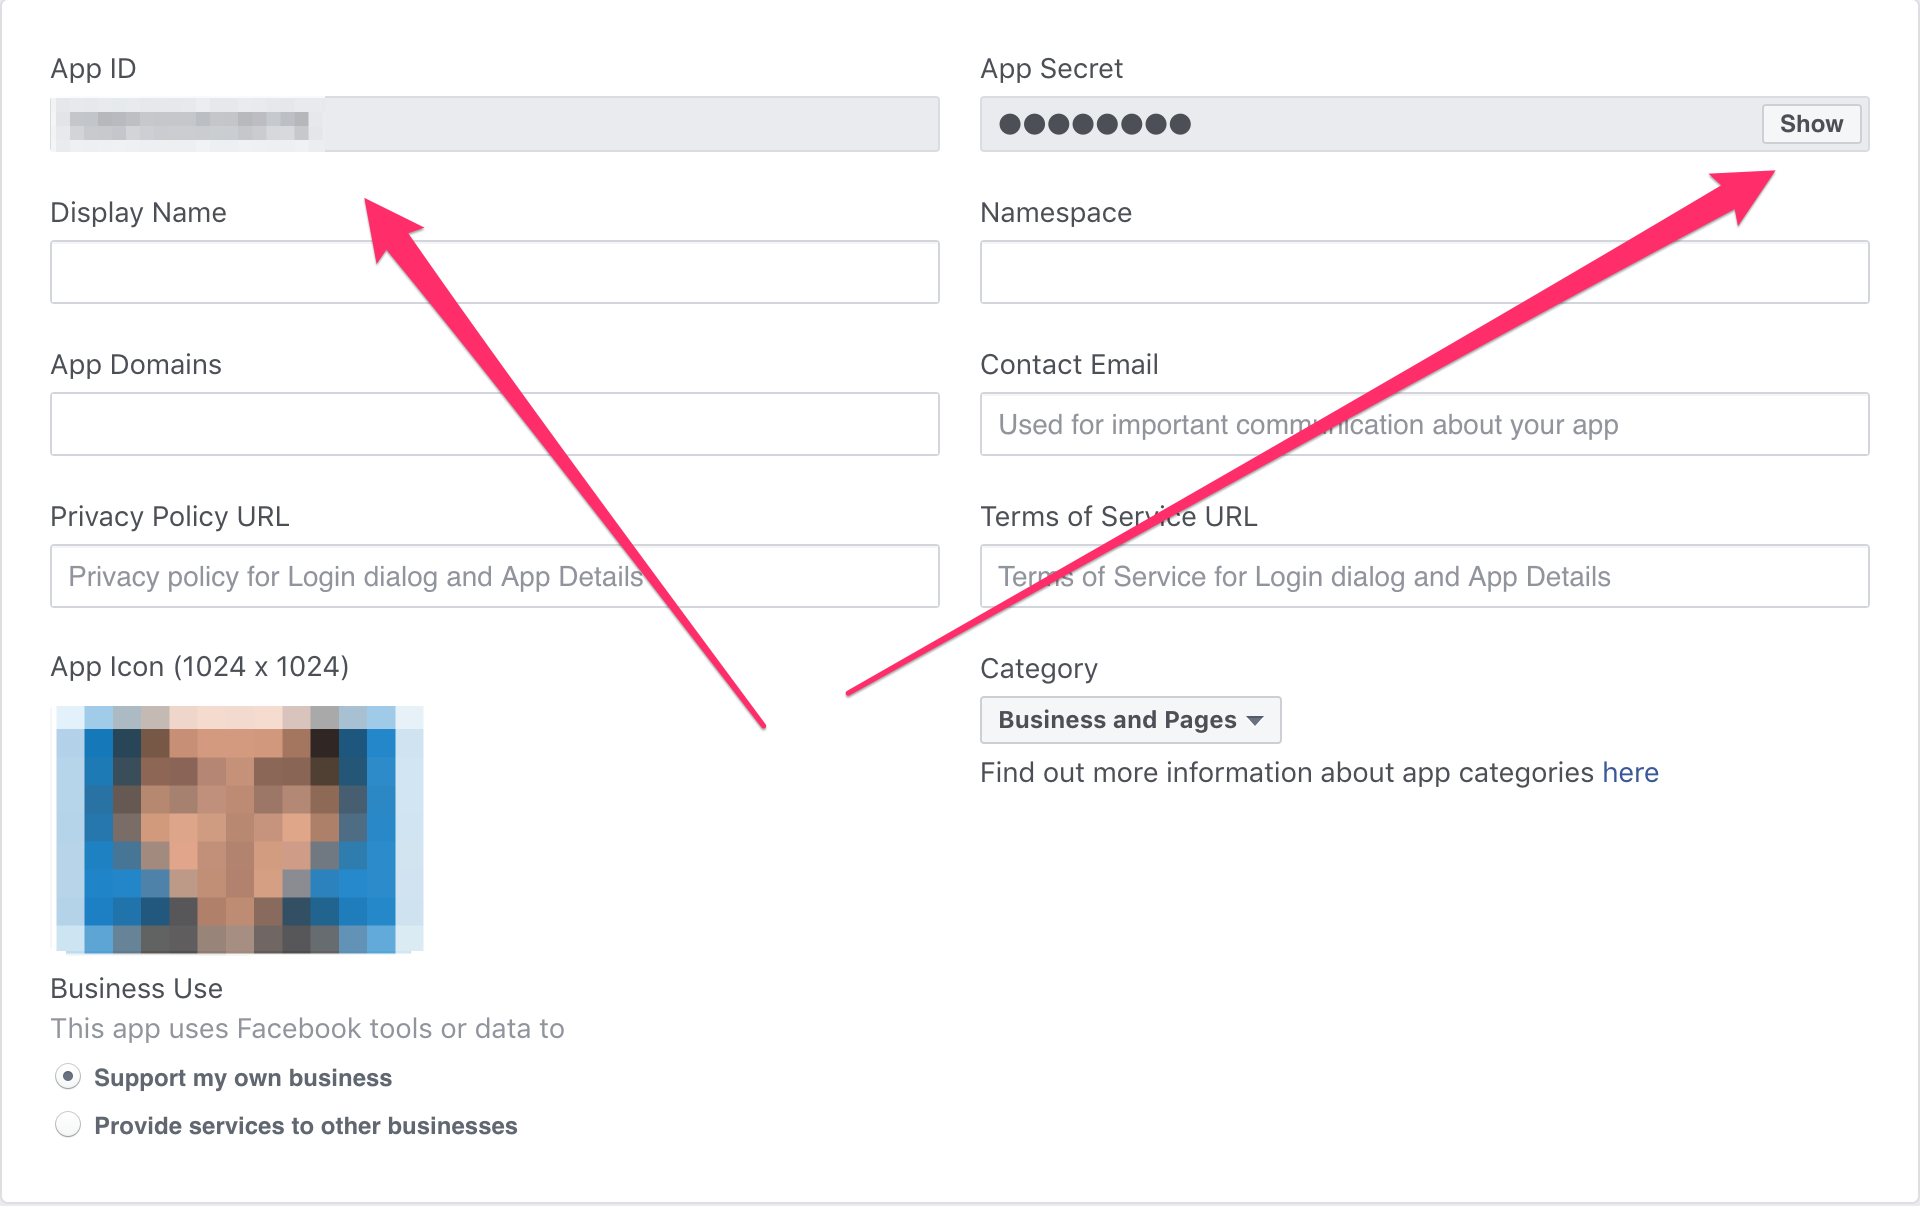
#1. Create a Facebook App
If you already have an app, skip to Step #2.
- Go to My Apps.
- Click "+ Add a New App".
- Setup a website app.
You don't need to change its permissions or anything. You just need an app that won't go away before you're done with your access token.
#2. Get User Short-Lived Access Token
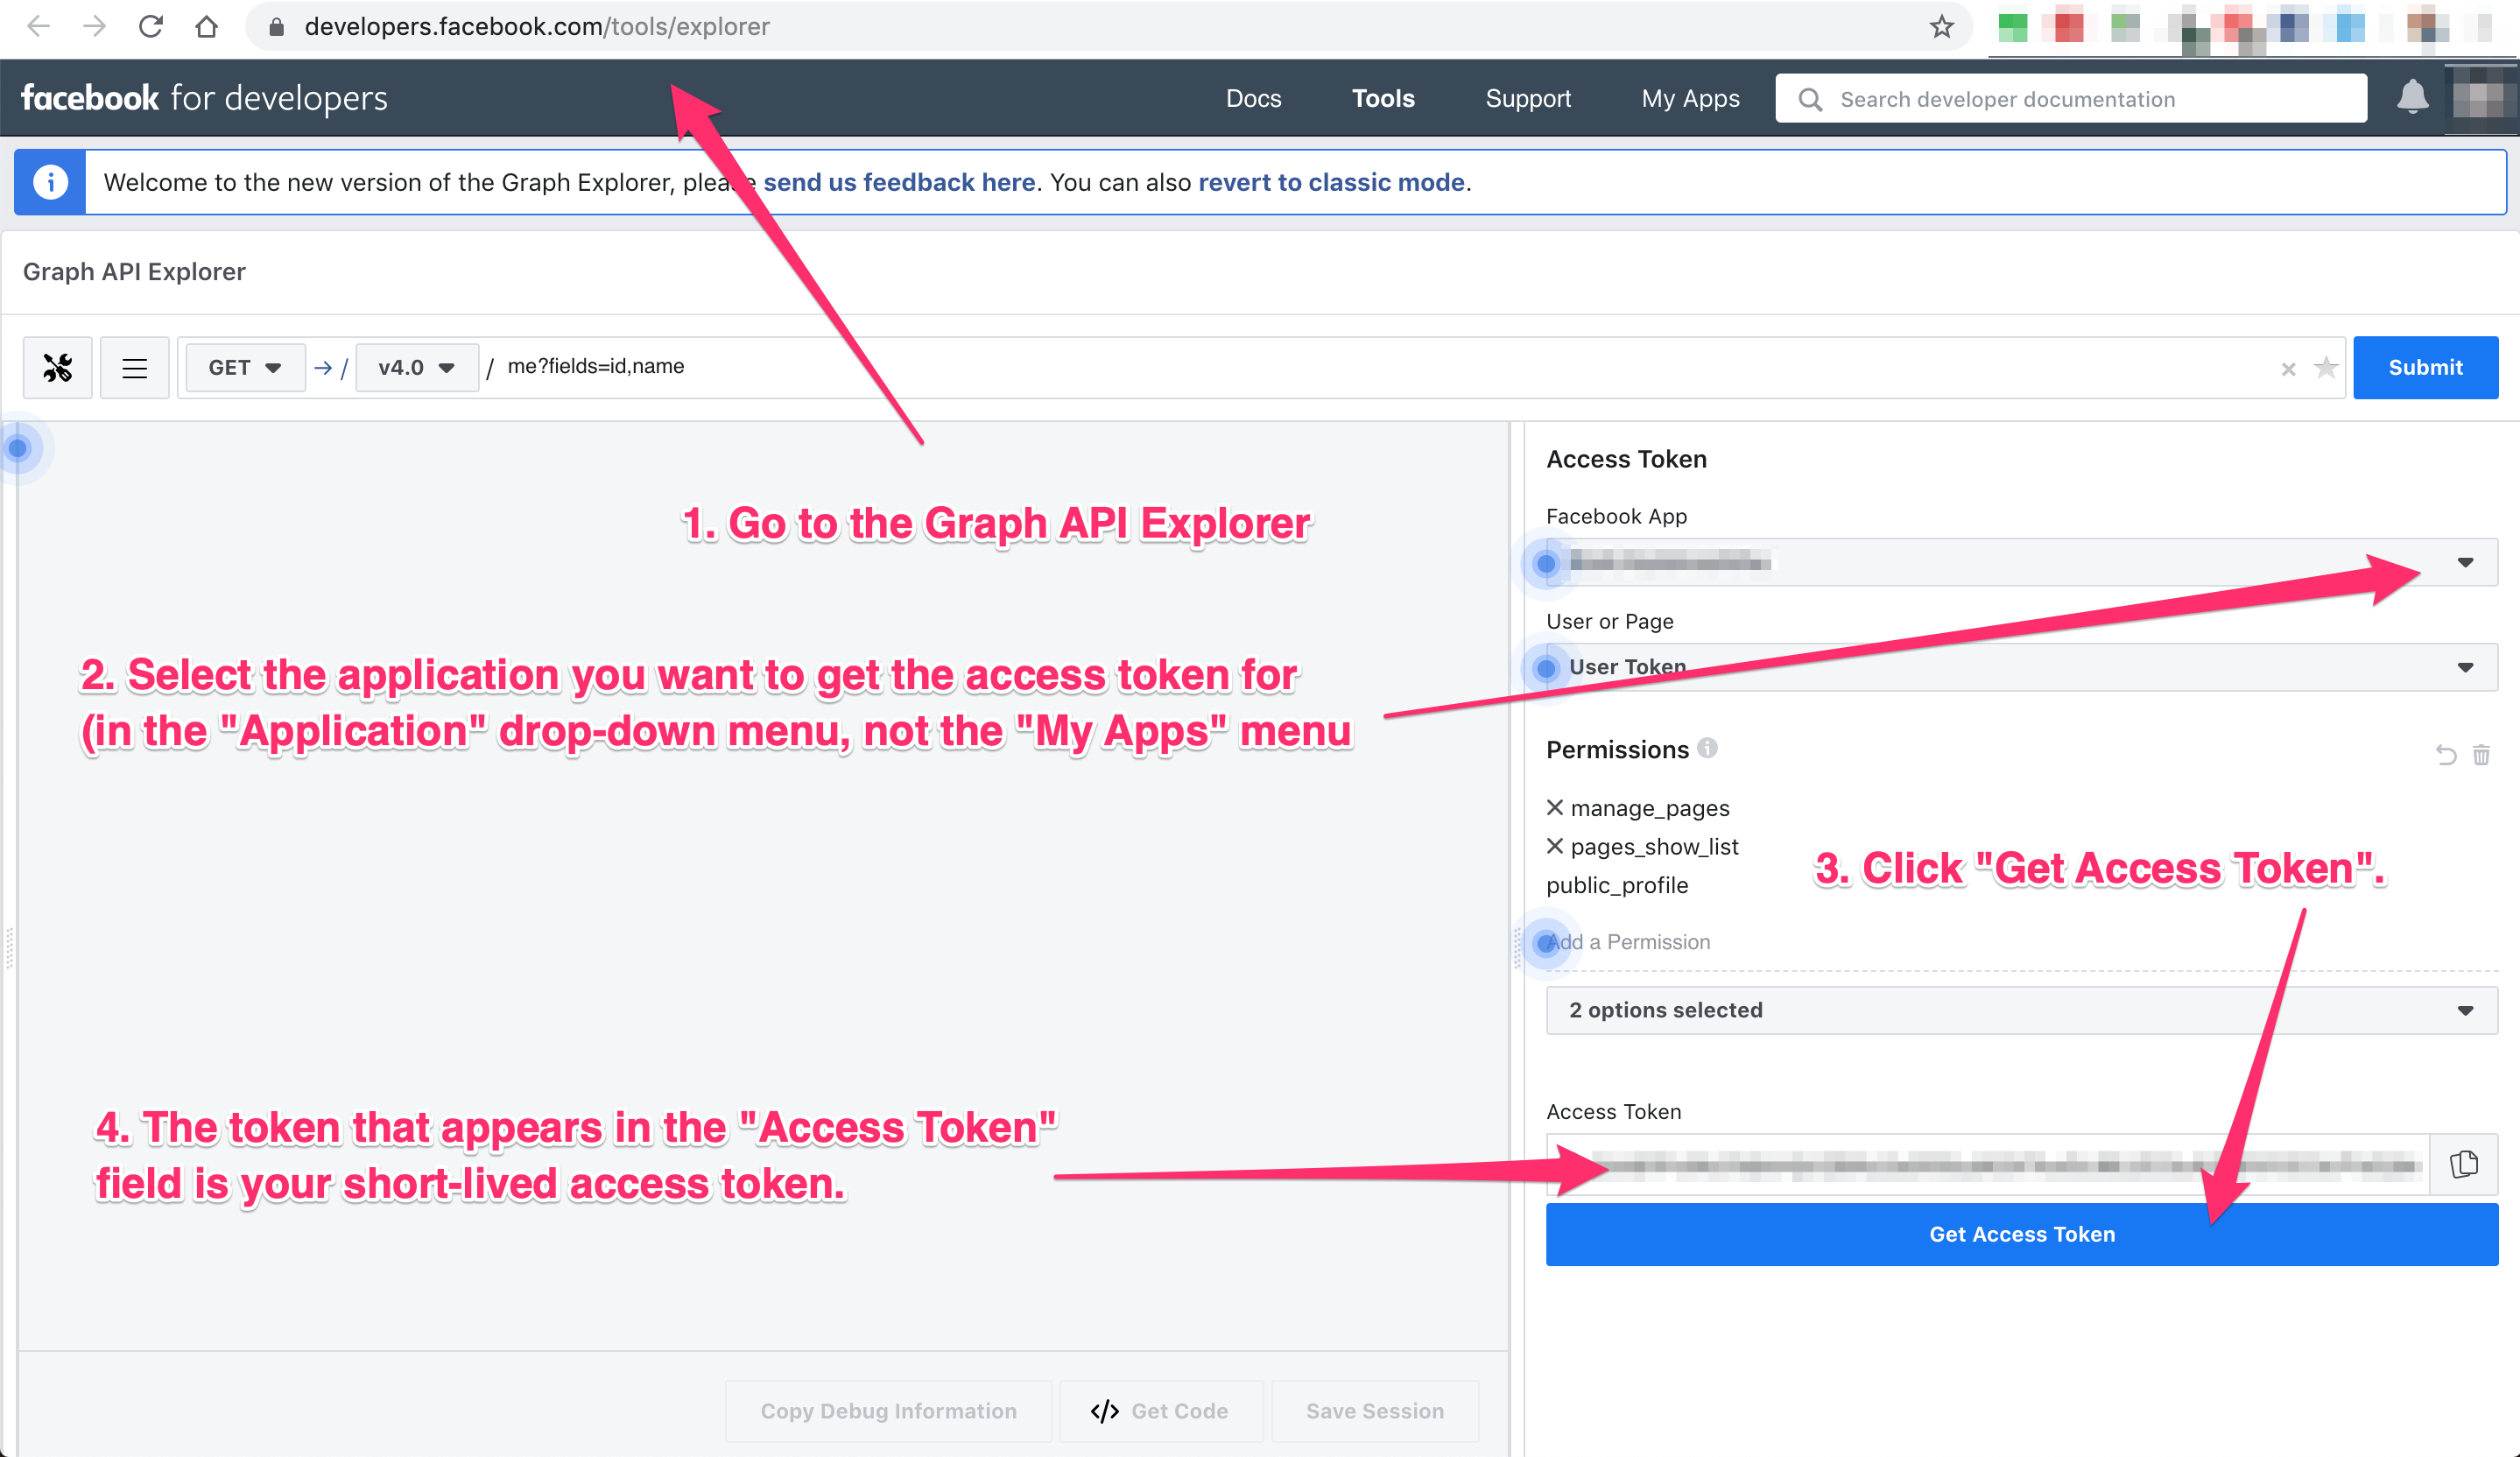
- Go to the Graph API Explorer.
- Select the application you want to get the access token for (in the "Application" drop-down menu, not the "My Apps" menu).
- Click "Get Token" > "Get User Access Token".
- In the pop-up, under the "Extended Permissions" tab, check "manage_pages".
- Click "Get Access Token".
- Grant access from a Facebook account that has access to manage the target page. Note that if this user loses access the final, never-expiring access token will likely stop working.
The token that appears in the "Access Token" field is your short-lived access token.
#3. Generate Long-Lived Access Token
Following these instructions from the Facebook docs, make a GET request to
https://graph.facebook.com/v4.0/oauth/access_token?grant_type=fb_exchange_token&client_id={app_id}&client_secret={app_secret}&fb_exchange_token={short_lived_token}
entering in your app's ID and secret and the short-lived token generated in the previous step.

You cannot use the Graph API Explorer. For some reason, it gets stuck on this request. I think it's because the response isn't JSON, but a query string. Since it's a GET request, you can just go to the URL in your browser.
The response should look like this:
{"access_token":"ABC123","token_type":"bearer","expires_in":5183791}
Help improve this page
You can:
- Log in, click Edit, and edit this page
- Log in, click Discuss, update the Page status value, and suggest an improvement
- Log in and create a Documentation issue with your suggestion

Socialfeed